Growing garlic from bulbils (seeds)

I just want to get as much information to you so you can have greater success growing garlic from bulbils.

Discover how to grow garlic from seed and improve your garlic.

Thank you for purchasing Garlic Seeds (Bulbils) from ‘Get to the Roots.’ I appreciate it. In this post, I want to teach you how to grow garlic from seed so you can have a more disease resistant garlic and increase your yield.

You may be thinking these seeds are small but remember these are bulbils (a.k.a. garlic seeds), not cloves.

What Are Garlic Bulbils?

Garlic bulbils are small teardrop-shaped bulbs that develop at the top of a garlic scape which can be harvested and planted. 

Typically, growers remove the scapes (the flower stems) in early summer to allow bulbs to grow larger.

garlic scape
Garlic scape and how bulbils form at the top of the scape.

These bulbils are exact replicas of the garlic bulb growing in the ground therefore you can plant many types of garlic in the same area because there’s no pollen involved. (essentially they are mini bulbs growing on top, that will grow into large bulbs when planted, after several years.)

Planting Garlic Seed (Bulbils)

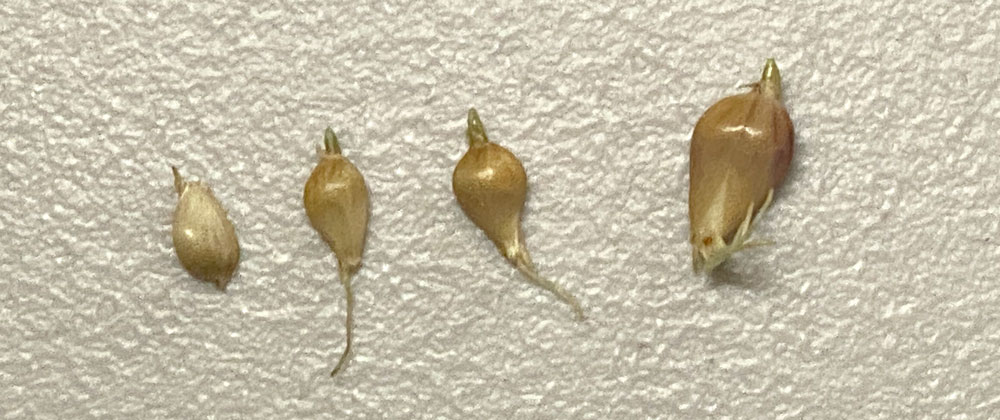
For best results plant bulbils in the fall and harvest in mid-summer, just like cloves. Remember that bulbils are very small, their green sprouts will also be tiny, like individual blades of grass, which you can eat. 

garlic seeds
Garlic seeds (bulbils) sprouting.

It’s easy to mistake them as weeds or blades of grass, so I suggest planting them in containers during the first year if this is a concern. 

On a side note, I don’t plant them in containers and have pulled many up as if it was grass growing in my garden, but no worries, just replant it.

Planting Garlic Bulbils in the Fall in a Container

Deep containers are best to encourage good root growth, and since you may want to pull out the “rounds” after the first season, bulbils can be grouped in a container together. 

planting garlic and growth


Garlic grows from seed to a round, to a bulb.

If you choose to plant garlic in a pot, plant at least ten in a 6 inch deep pot (10-12 inches deep is better). Plant the bulbils (garlic seed) one inch deep and 1-2 inches apart from each other in the container. 

  • Plant ten in a 6 inch deep pot. (deeper is better). 
  • Plant the bulbils one inch deep.
  • Plant 1-2 inches apart in the container. 

A 6 inch diameter pot should give plenty of room for ten bulbils evenly spaced.

Sink the container into the ground outdoors, so the pot’s rim is just above ground level, and mulch with straw or leaves. Sinking the container in the ground will prevent the bulbils from excessive freezing and thawing over winter. 

In spring, remove some of the mulch to allow the sprouts to grow. It’s crucial to water consistently and prevent weeds so you don’t accidently pull them up. 

If you accidentally pull up a bulbil, just replant and water immediately. I have found that they are pretty hardy and tolerant of accidents.

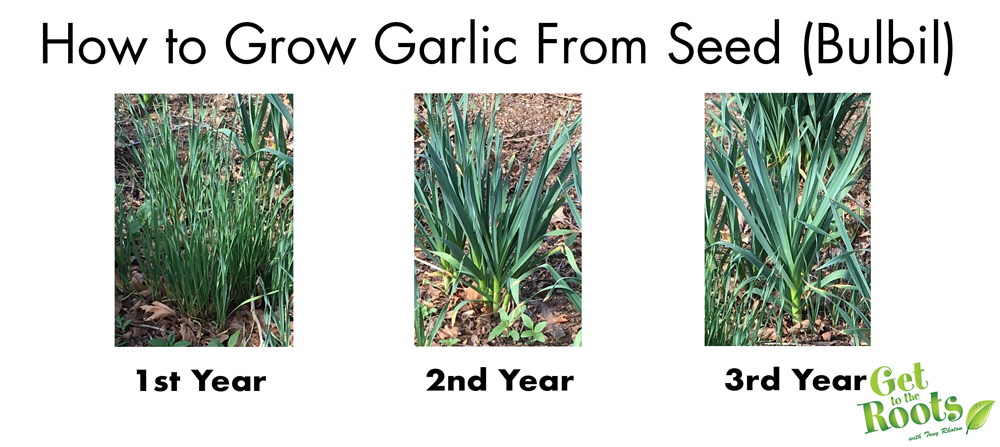
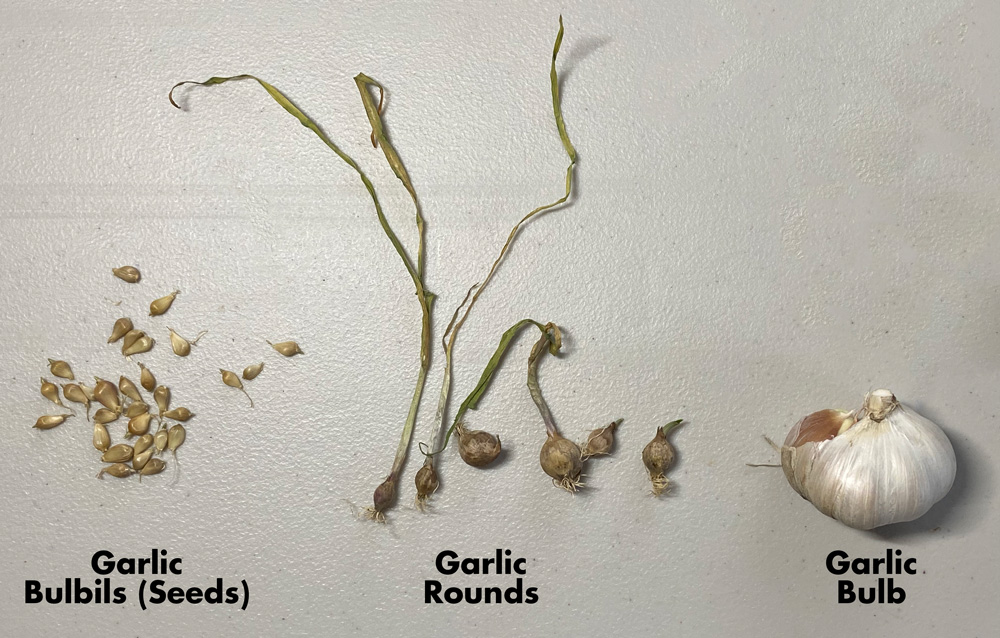
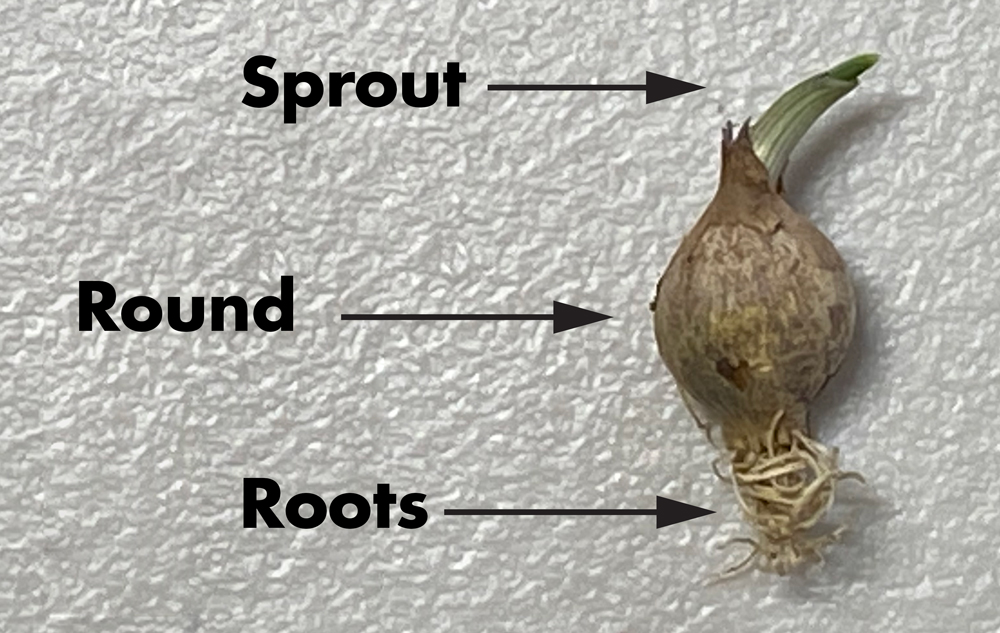
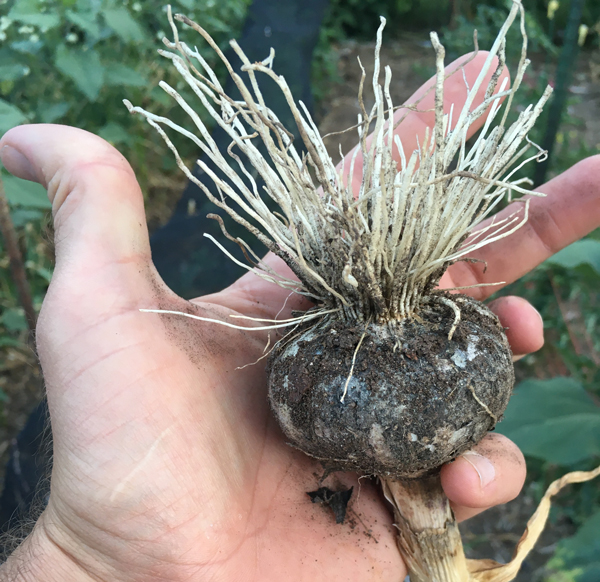
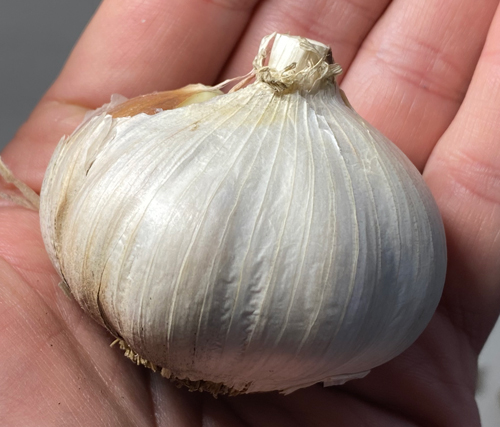
When you harvest regular garlic bulbs, you can dig up your bulbils, which should have evolved into “rounds” of approximately half of inch to an inch in size. 

Garlic Round


Bulbils develop into a garlic round which will grow roots and start sprouting.

Plant these in your garden beds in the fall and they should grow into fully divided bulbs by the second summer harvest.

Planting Bulbils in the Fall Into Garden Bed

If you choose to plant directly into the garden follow these instructions:

  • Plant bulbil at least 1 inch deep.
  • 5 inches apart.
    (I choose not to pull mine out of the ground until I’m ready to harvest.)
  • Space rows 6 inches apart. 
  • Cover with dirt.
  • Cover with two inches of mulch (straw, leaves, wood chips)
  • In spring, remove some of the mulch to allow the sprouts to grow.
  • Water consistently. 

Remember, if you do accidentally pull up the bulbil, just replant and water immediately. 

If you choose to pull up, cure and replant the harvest when you would harvest your garlic, cure the bulbil and replant in late fall.

Achieve Large Garlic Bulbs

Large Garlic Bulb
Garlic bulb harvested after third year.

Bulbils take two to three years to produce a large sized cloven bulb. Larger bulbils may produce small cloven bulbs the first year but if you want larger bulbs:

  • Harvest bulbils when you harvest your garlic, mid-summer.
  • Cure the bulbils. 
  • Replant in late fall. (I recommend late October, depending on your area.) 
  • By the third year, bulbils should be a normal-sized bulb if not larger.

Planting Bulbils in the Spring

Planting garlic in the spring you will want to follow the same planting as the fall planting with a light mulch but sow directly outside as soon as the ground can be worked.

Why grow garlic from bulbils?

  • Generally bulbil-grown garlic is larger and more vigorous than conventional clove-grown garlic. 
  • It’s easier to make sure you maintain high quality garlic.
  • It’s easier to avoid diseases.
  • It’s easier to grow your harvest yield long-term. 
  • Easier to propagate. 
garlic bulb
Garlic bulb cleaned up and ready to for consumption or planting for a much faster harvest.

My approach to gardening

I believe gardening should be easy and fun so I don’t pull my garlic out, cure it and plant again. To me, this is more work added on to my already busy schedule so I have chosen to leave my garlic in ground, cover with mulch and not worry about it.

You may want to try doing this with some of the garlic you plant to see if it makes growing garlic more fun and enjoyable for you.

Growing this way, I still get a harvest it they are a little smaller bulbs though. The images you see above were all harvested from my garden.

I love gardening and being a life coach and both are intertwined a lot.

2 Responses

    1. My pleasure. I look forward to seeing your abundant harvest. While you wait for the bulbs, you can eat the greens, they’re delicious. I recommend planting some that you’ll harvest just for greens and others that you’ll leave alone to develop the bulb, either way, enjoy.

Leave a Reply

Your email address will not be published. Required fields are marked *